I love creating electronics projects in the most cost effective way. If you're going to use an Arduino in a project, you could embed the whole $30 board, or just the $3 IC chip. Unfortunately, after using just the chip, a brand new ATmega from electronics resellers won't work with the Arduino right off the bat. You have to program the bootloader onto the chip for it to work properly. This blog post will show you how to program the bootloader using a great $20 electronics multitool, the ZeptoProg II, in a few easy steps.
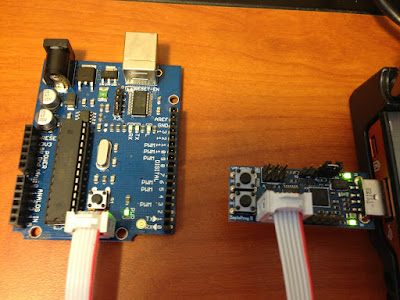 |
| Arduino Diecimila and ZeptoProg II |
- Download and install AVR Studio 4.19 from http://www.atmel.com/tools/studioarchive.aspx
- Install drivers for ZeptoProg II from instructions in User Guide on http://www.mattairtech.com/index.php/development-boards/zeptoprog-ii.html
 |
| ZeptoProg II colored for refrence in below steps |
- Plug in the ZeptoProg II, holding down the A pushbutton (colored red above) so that it enters programming mode. Install any remaining drivers at this point.
- Connect the ISP header from the ZeptoProg II to the ISP header on the Arduino, ensuring that they are in the same orientation (the top, left pin on the purple-colored ISP header is pin #1 on the ZeptoProg II, pin #1 on the Arduino should be labeled). Ensure the jumper is connected on the ZeptoProg II so that it powers the target (label colored yellow above - it's the first two pins).
- Run AVR Studio 4.19, and press the "Connect" button (IC chip with "Con" on it) and select "AVRISP mkII"
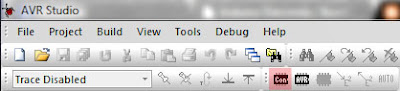 |
| Connect button is colored red |
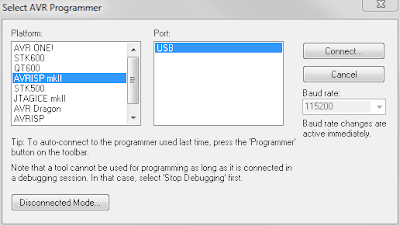 |
| Selecting "AVRISP mkII" as the programmer |
- A dialog box called "AVRISP mkII" will appear. Click on the "Main" tab and select "ATmega328p". Press "Read Signature" and ensure that the "Signature matches selected device". Ensure that ISP mode is the programming mode and change the frequency to 125 kHz in "Settings" if need be.
- Next, go to the "Program" tab and select the Input HEX file for the flash. The .hex for your device will be located in the Arduino installation files at "\Arduino\hardware\arduino\bootloaders\atmega\ATmegaBOOT_168_atmega328.hex" (You do have the Arduino Software (http://arduino.cc/en/Main/Software) downloaded, right?).
- Next, go to the "Fuses" tab and click the "Read" button. Change the value of EXTENDED to "0xFD", HIGH to "0xDA", and LOW to "0xFF".
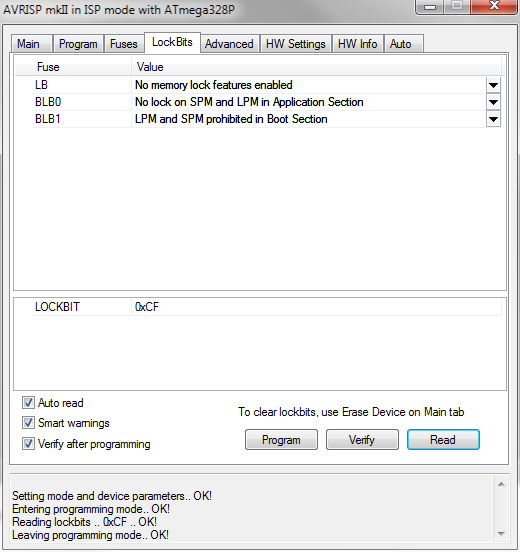
- Next, go to the "LockBits" tab and click the "Read" button. Change the value of LOCKBIT to "0xCF".
- In the "Auto" tab, select "Erase Device", "Program FLASH", "Verify FLASH", "Program fuses", "Verify fuses", "Program lock bits", and "Verify lock bits". Hit start and, if there's no warnings or errors, the process is complete.
You can now attach your Arduino to the computer with the USB cable, and fire up the Arduino software and ensure that a simple sketch (I recommend Blink) uploads without any errors. Congrats, you just programmed the Arduino bootloader into a virgin ATmega328p.


No comments:
Post a Comment